This past week, I have been experimenting with diy jewellery, using a variety of mediums, such as wire, polymer clay, crochet and beads. This is one of those attempts.
This pendant is a great project for beginners, as it does not require exceptional skills or any hard to find materials, just a lot of patience.
Materials Required:
For the Bezel:
- 18 Gauge Wire (Most thick wires work fine, because we don’t do anything complex with the wire)
- 26 Gauge Wire (Most thin wires work fine)
- Round Nose Pliers
- Wire Cutters
- Anything round to shape the wire
- E-6000 or any strong glue
For the design:
- Polymer Clay in black, green, white, gold, peach, purple and red
- Blade
- Needle Tool/ Needle/ Safety Pin
- Dotting Tool
Step 1: Take some of your thicker wire and wrap it 1 1/4 times around a circular object like a gluestick.


Step 2: Trim the excess wire to have only about a 3 cm overlap. Then bend the two wire pieces at 90°.

Step 3: Make two loops of the wire pieces sticking out.

Step 4: Wrap thin wire around the base of the two loops to bind them together securely.

I made one more with grey wire so that it would go better with my choice of colours for the pendant.

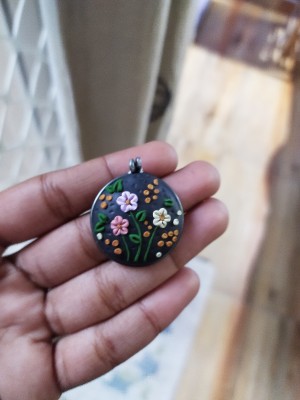
Step 5: Fill the loop with black clay. Gently press on all sides to create a domical shape.

Step 6: Take the purple clay and roll out tine balls. Place them in a flower shape.

Step 7: Use a needle tool to make an indent on each ‘petal’ of the flower.

I made two more flowers, one in a cream colour, and the other in pink.

Step 8: Roll out 3 golden balls and use them as centres for your flowers.

Step 9: Roll out thin coils of green clay and add them as the stems.
Step 10: Roll out many small balls out of gold clay and arrange them in tapering patterns as illustrated or as fillers in different places.


Step 11: Roll out tiny teardrops from green clay, then make an indent with a needle tool in the middle to form a leaf.

I made 7 more of these leaves and attached them to the stem as well as in bunches around the flowers.
Step 11: Add tiny balls made of cream clay in areas that seem too empty.

Step 12: To add a final touch, take your dotting tool and make shallow depressions throughout the pendant.

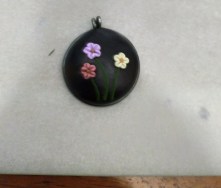
I made another pendant, but predominantly in hues of blue and green. I added this tiny bird as well.

Bird:
Step 1: Make a a flattened teardrop whose one side is straight while the other is curved.

Step 2: Make a hole as the bird’s eye and make a tiny triangle as its beak.

Step 3: Add a smaller flattened teardrop of gold clay and add it as the bird’s wing. Make 2 tiny triangles as the tail feathers.

Now, it’s time to bake the pendant as per the baking instructions of your polymer clay brand.
After the pendant is done baking, the bezel will likely pop off. Secure it with E-6000 or any other strong glue.
The pendant is now complete!

Beautiful, I have placed an advance order for May!!
LikeLike
I love both your clay pendant and the wire bail. Great ideas!
LikeLike