This page details all my completed and in-progress builds.
I’m a beginner and at times, my code may be sloppy, documentation weak, and I may describe problems that have obvious solutions. So, bear with me.
Work in Progress:
R2D2 desk companion
I have been binging Star Wars these past two months, so I had to make something dedicated to my favourite droid. I’ve been wanting to learn ML-based command recognition. I want to use one of those paper templates available online to create an 8-10 inch tall R2D2. I want it to respond to the command “Hey Artoo!” and play its characteristic whistle-beep sounds while changing its LED colour from red to blue. Some basic animation through wake-word detection. Based on my research, there are ways of command recognition through existing tools, but I wanted to set up my own model.
How far I’ve gotten:
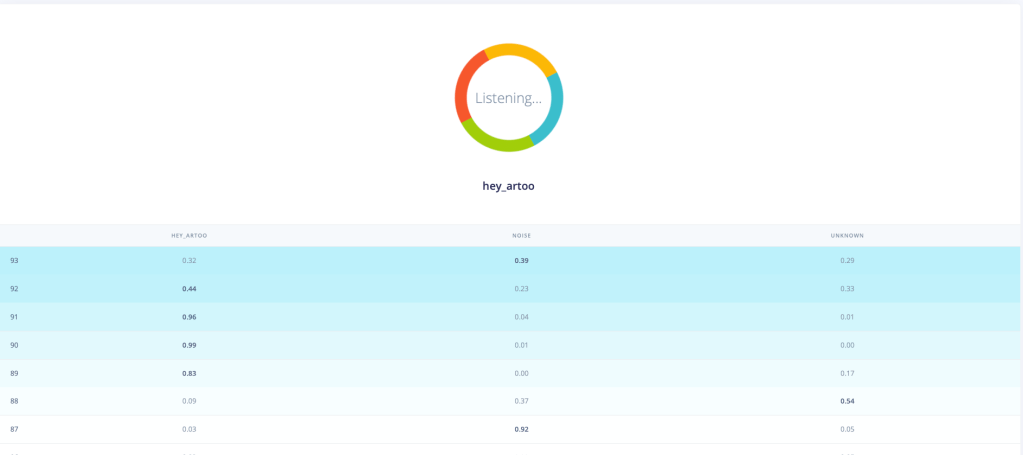
I used Edge Impulse, a development platform for edge machine learning models. It’s pretty great for a newbie like me. The entire way this works is so cool to me. The code essentially converts any sensor data or audio stream into a spectrogram and then uses image recognition techniques to recognise and learn features. I’ve successfully created a model that can recognise “Hey Artoo”. It has pretty decent precision. It has been trained on my voice (and some low/high-frequency versions I generated) alone, so I’m sure there is lots of room for improvement.

Next steps:
My boards do not have an inbuilt microphone. The sample code that the site generated for deployment is only for certain boards with inbuilt microphones. Currently trying to configure an external microphone with my ESP32. There are a million different kinds of microphone drivers so I had to figure out which one I need. Once I get satisfactory input, I’ll try to edit the code the site generates so that my board can run it. I was intimidated by the 50 files that were downloaded. Don’t know where to start, but I’ll get there.
R2’s body is shaping up quite nicely. I had made the head, but then accidentally sat on it, so I need to get a new set printed on some cardstock. I’ll get to this once I’m done with the circuitry.
Binary Display Watch
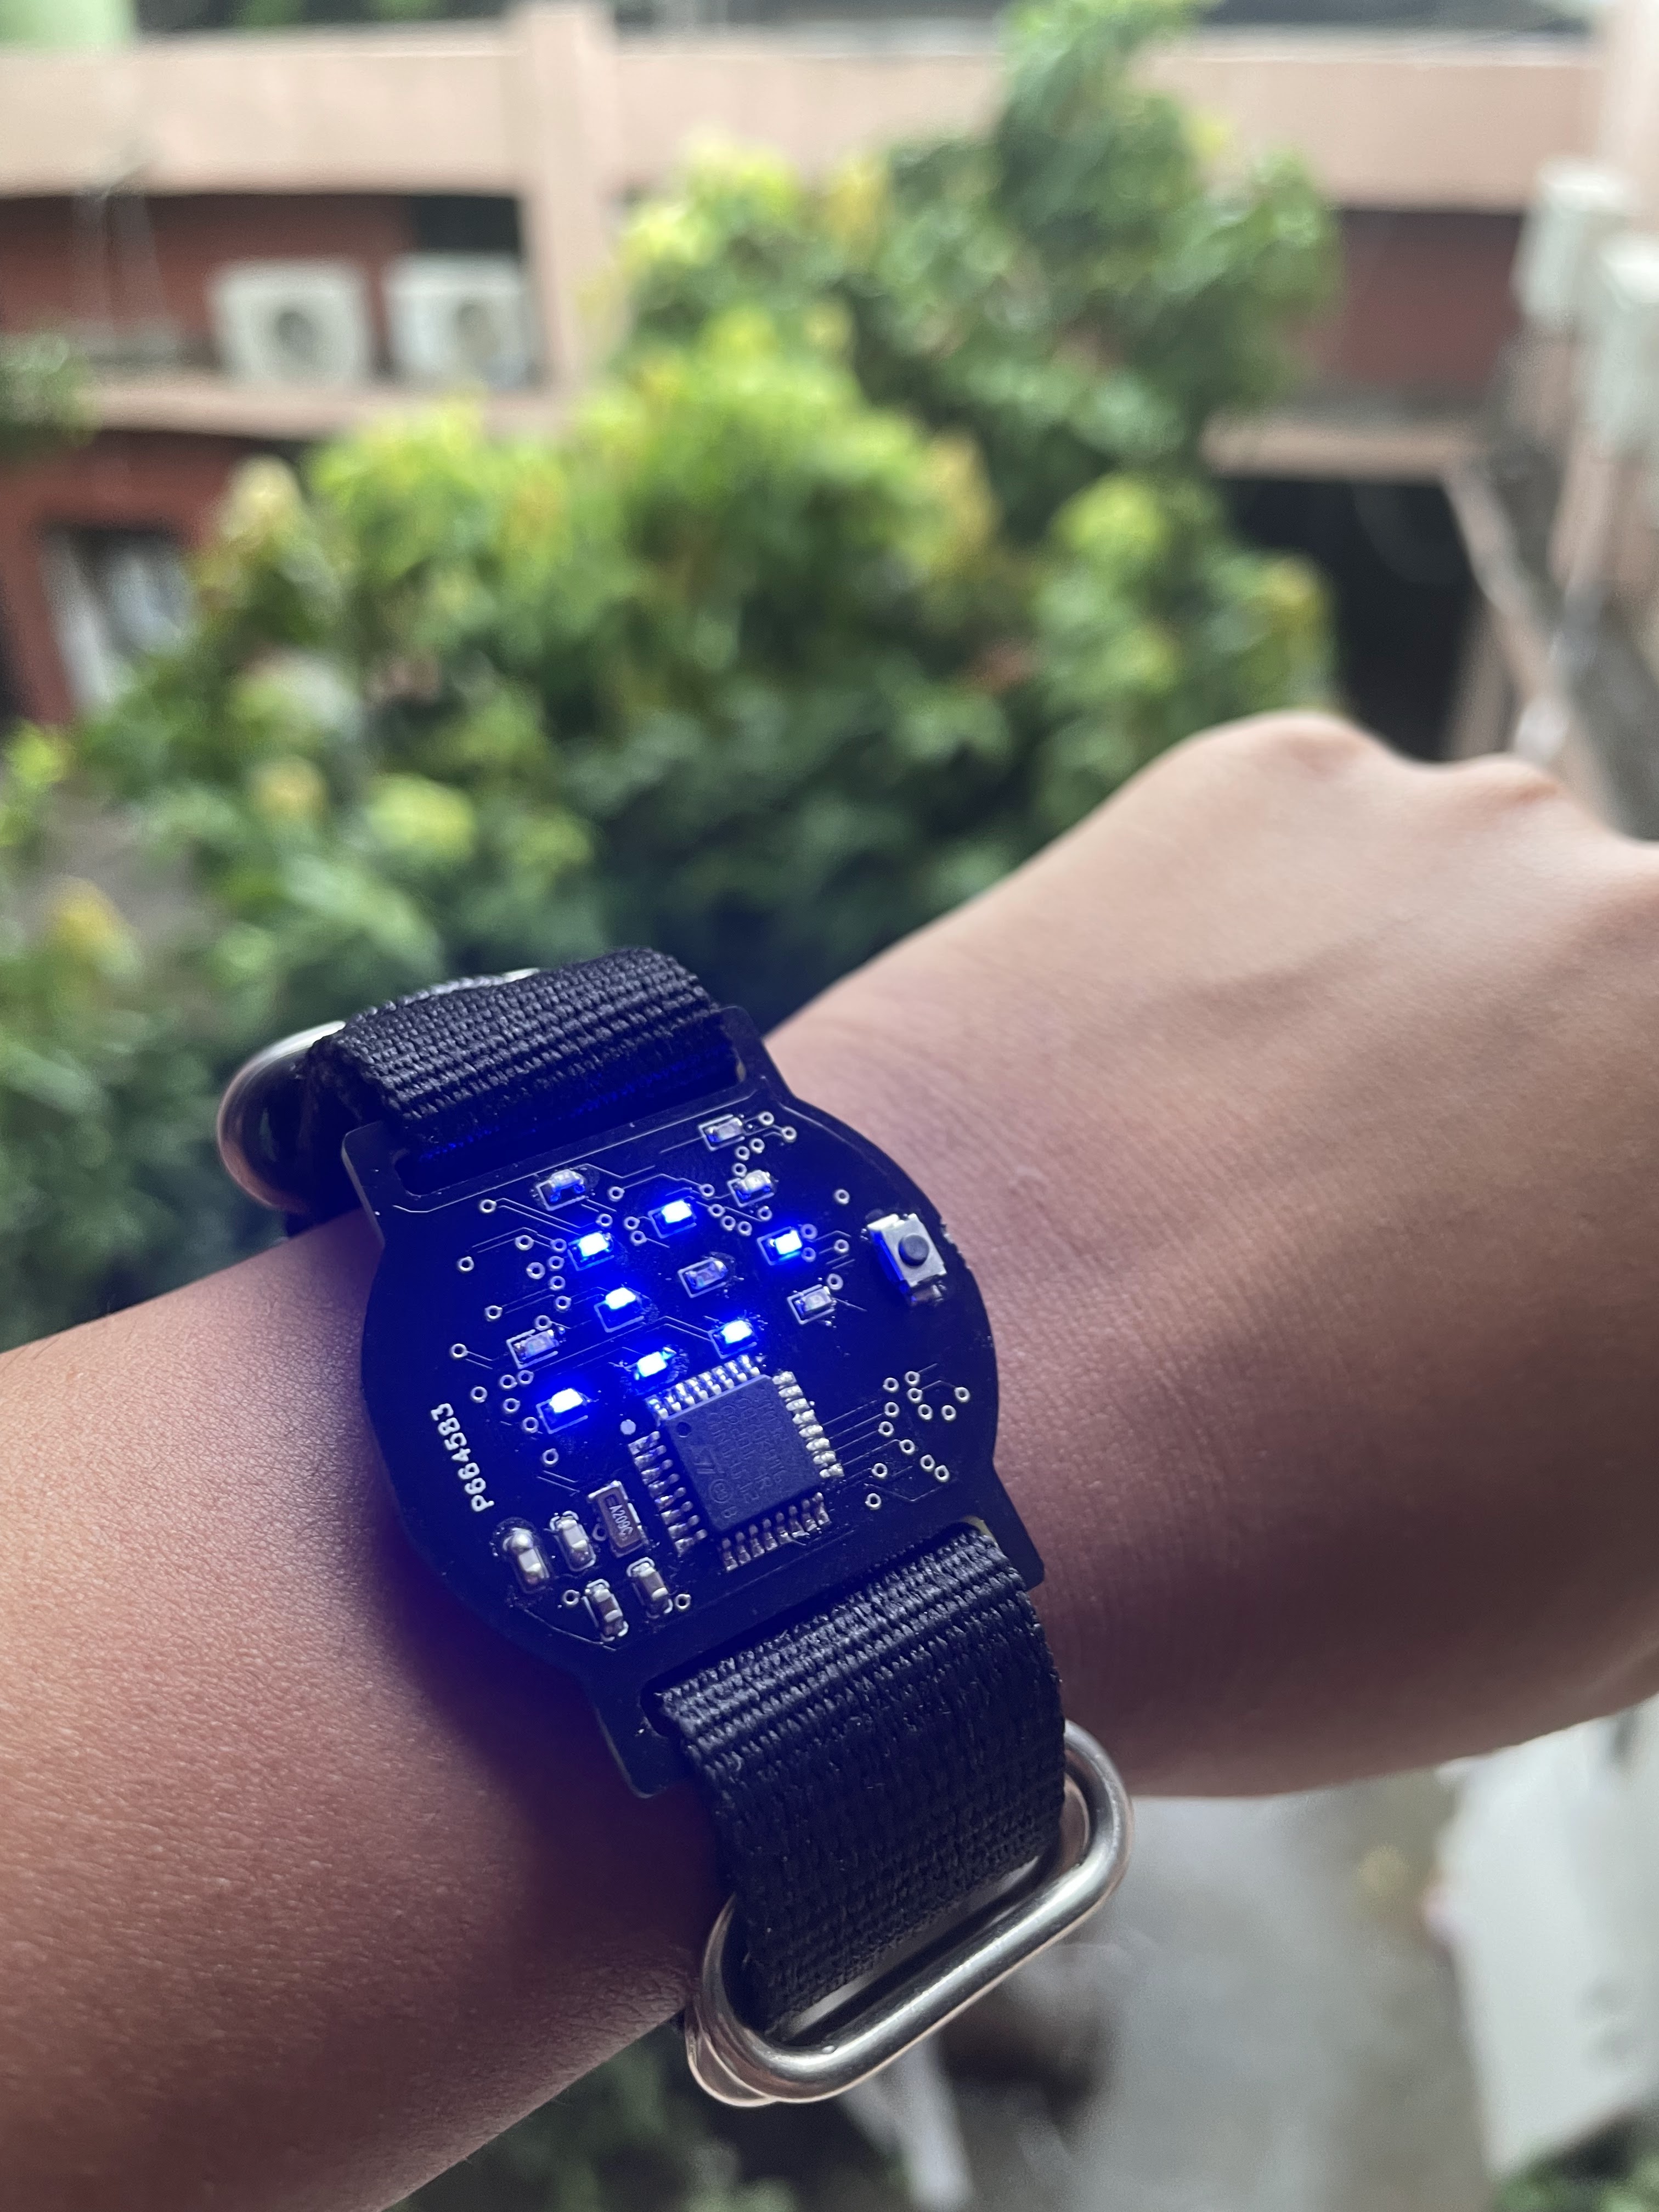
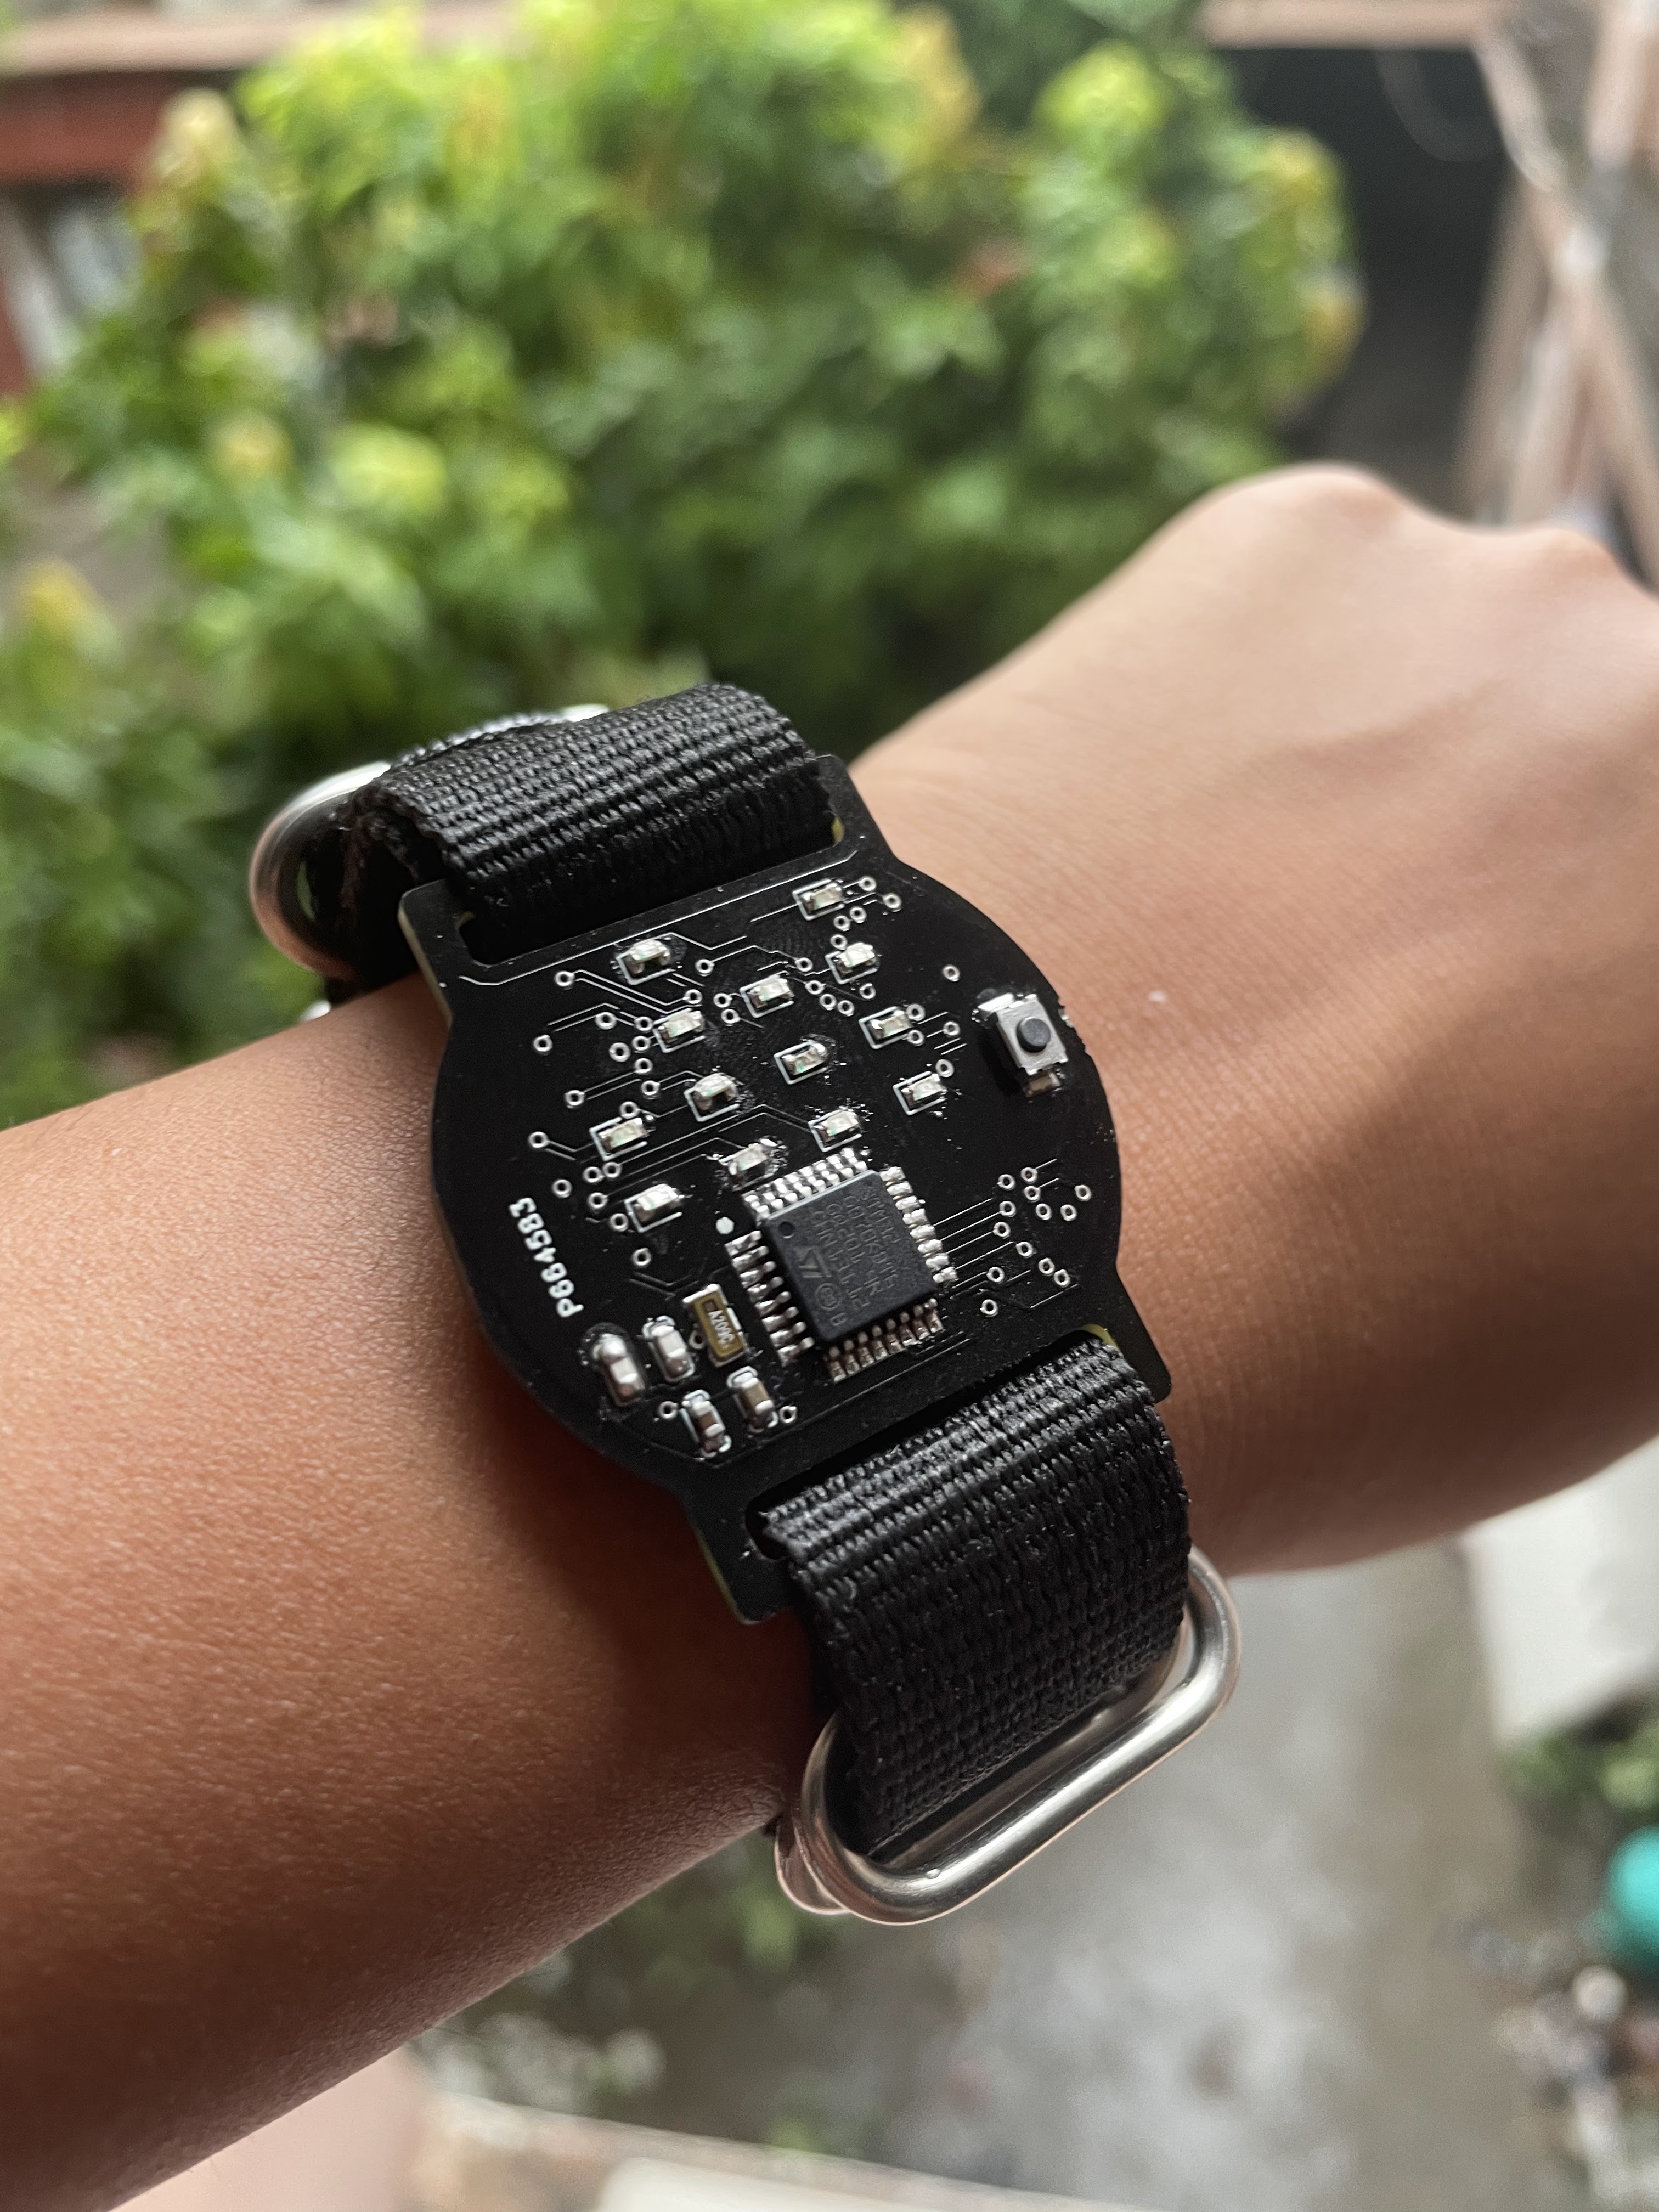
I made this watch this summer break because I’ve been wanting to get better at PCB design and level up from programming microcontroller boards to bare chips.
This watch is based on the STM32G070KBT6 microcontroller. I designed the PCB and wrote the firmware from scratch. The watch face displays each digit of the time in binary.
P.S. The time shown is 17:52 (0001 0111 0101 0010 in binary decimal, with 1s representing lighted LEDs). Over the course of designing the watch and wearing it over the past day, I’ve become quite accustomed to the format. It’s not that hard once you get used to it.
Relevant links:
Other details: I spent the last two and a half months interning at the Indian Institute of Technology, Delhi. During my internship, I worked on developing a calibration protocol and infrastructure for low-cost Carbon Monoxide Sensors, and I also created a temp-controlled heating inlet for nephelometers. Working here was really great because I learned a lot of skills along the way that helped create this watch, and had access to great mentorship (thank you, Prasannaa and Saran Sir!) and a very cool electronics inventory.
IKSHANA: A real-time text to braille convertor
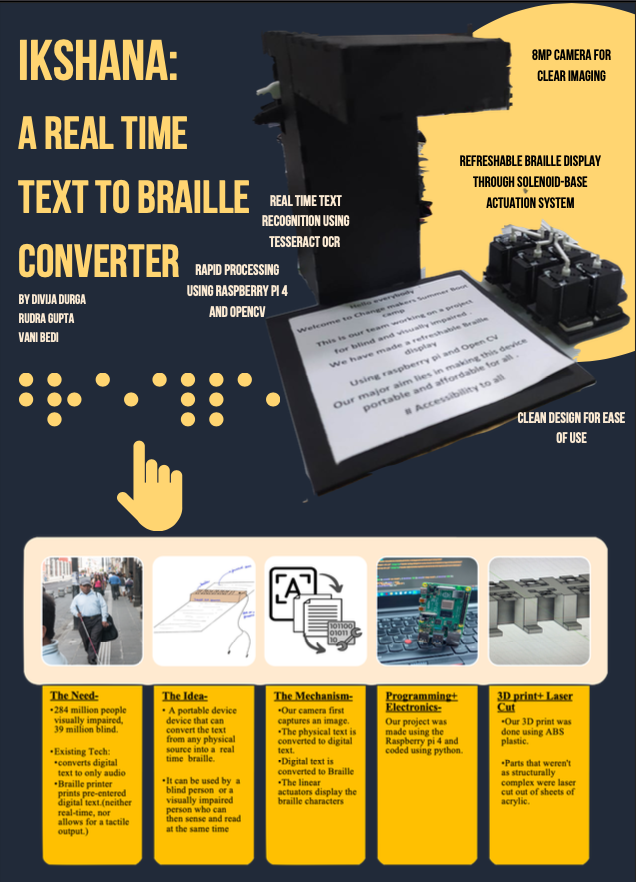
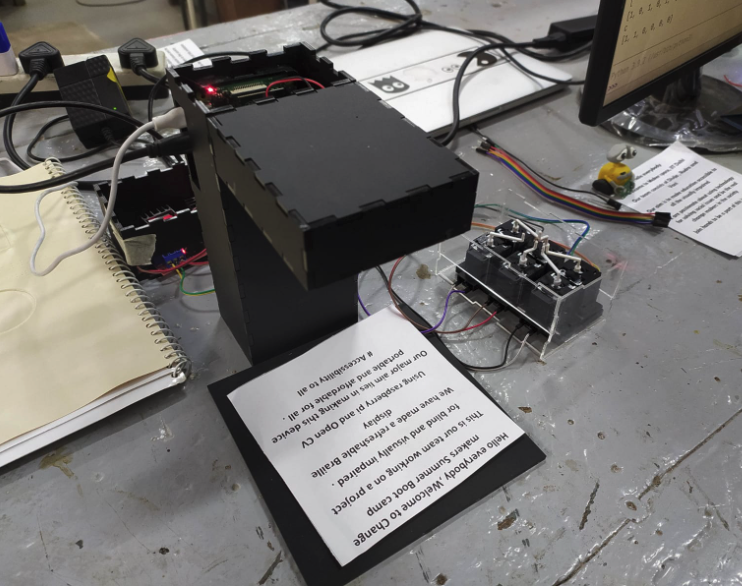
Our team created IKSHANA, a real-time text-to-braille convertor as part of a 5 week bootcamp hosted by the Indian Institute of Technology, Delhi. It can scan text from physical sources like newspapers, postcards, or phones and instantly generate braille.
Our project consists of 2 parts: the scanner, and the refreshable braille device (RBD). Through our custom OCR system and camera module (8 MP for clear imaging), the scanner first scans external text into a digital form. The microprocessor converts digital text into a form understandable by the RBD using our novel translation algorithm. Our RBD is composed of a matrix of solenoids with custom-printed shafts for optimum tactile acuity. The RBD displays the braille characters in rapid succession.
Key innovations by our team include-
- Paper-embossed braille is heavy, expensive, and only useful for a brief period of time, hence it is only available for a limited part of digital content. IKSHANA can translate content from a wide variety of sources ranging from newspapers and books to even phone screens.
- Braille printer prints pre-entered digital text. This method is costly, time consuming, and not real time. IKSHANA doesn’t require any digitally entered text. The OCR system specially designed for imperfect images is able to scan text from physical sources with decent accuracy.
- The spatial aspect of text required for learning, spelling, algebra, and equations is not provided by speech synthesis software. This constraint is overcome by the Refreshable Braille System of IKSHANA. Our team designed an RBD using solenoids and a set of custom-printed shafts.
- Our team created a novel algorithm for translation of English text to braille characters.
- IKSHANA also has a portable and sleek design, giving it an upper hand over braille printers and books.
Our current project has been created as a proof of concept for one character in English. Our final design consists of a keyboard-like matrix of characters with multiple rows and columns that refresh after the user is at the last character of the matrix. Future iterations also include functionality for handwritten text and other languages and reduced size.
Relevant links: Documentation
Other details: For this project, I had access to facilities like 3D printers and laser cutters. I learnt a lot of skills like basic CAD and configuring machines like CNCs and laser cutters. It was also my first time working with a Raspberry Pi. I have coded in Python before, so it was incredible seeing snippets of code have such tangible results. All the mentors were incredible. One of my mentors saw me wearing my handmade PCB earrings and spent some time teaching me actual PCB design using EagleCAD so that I’ll be able to create functional PCB earrings in the future. (Update: I did end up creating a binary watch, and some other custom circuit boards!)
Ray: The Smart UV Tracking Necklace
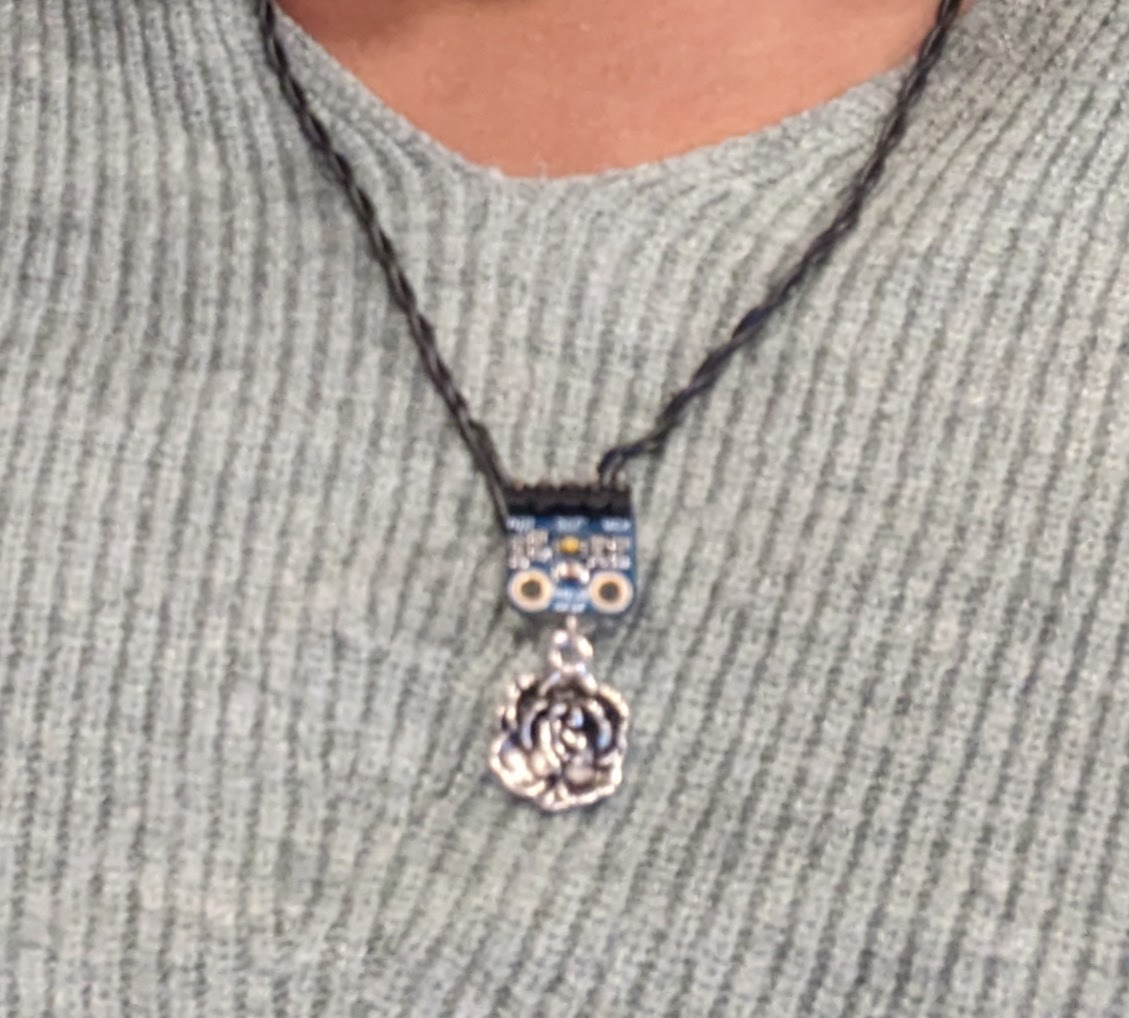
“Ray” is a wearable technology project that combines fashion with healthcare. This project introduces a necklace that is integrated with a UV sensor capable of tracking UV radiation. Paired with a mobile app hosted using Blynk, “Ray” aims to revolutionize how individuals interact with and manage their sun exposure.
Key Features:
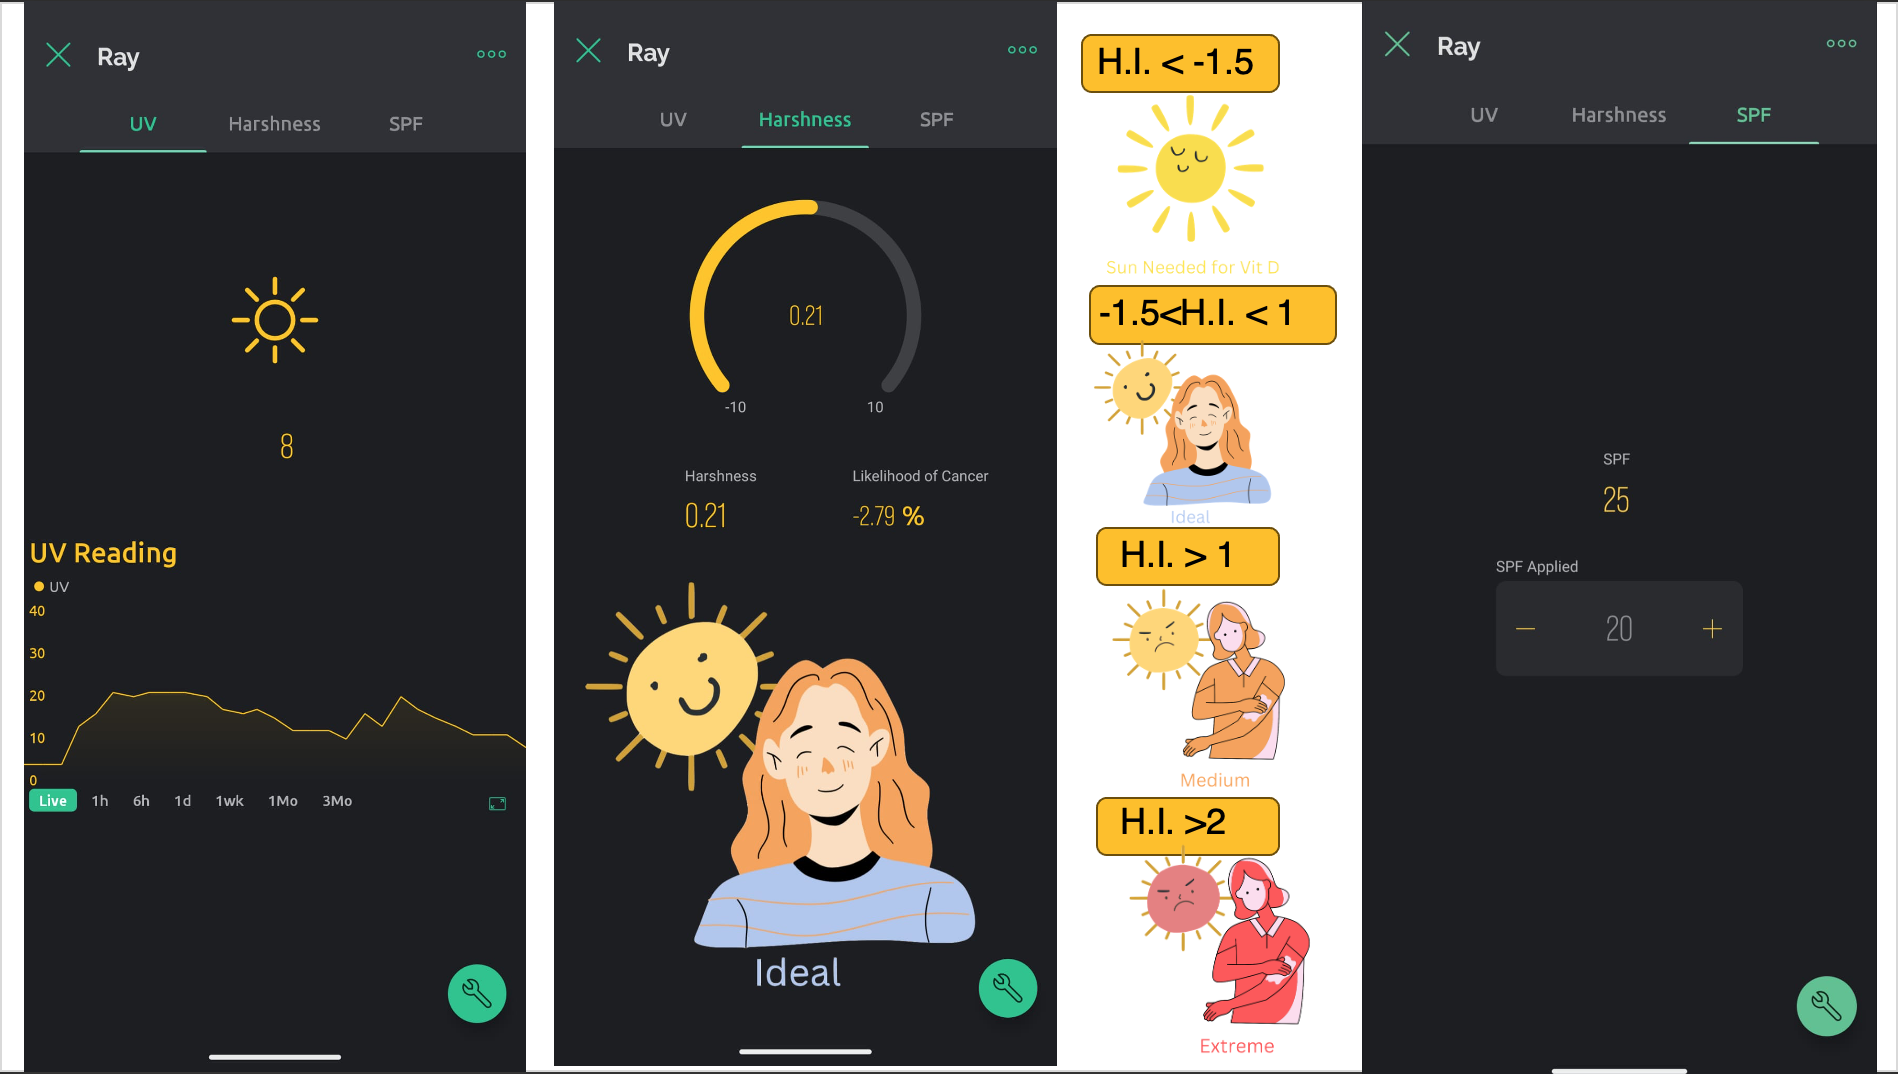
- UV Monitoring: Continuous tracking of UV levels to give real-time and historical data through a chart and value display.
- Harshness Index: UV monitoring technology currently available in the market displays only real-time UV values. However, prolonged UV exposure can be harmful, and existing solutions do not take into account the duration of exposure.Additionally, existing solutions do not account for the application of sunscreen by a user. Our solution utilizes Machine Learning to develop a “Harshness Index”. It incorporates a temporal component, hence, considers both the time of exposure and the level of UV radiation. Additionally, our project takes in user input about the SPF applied. Based on this data, it makes personalized suggestions to users to increase or decrease their sun exposure.
- SPF Recommendations: Intelligent algorithm that suggests suitable SPF protection based on the current UV index, and user-inputted value of SPF applied.
- Skin Cancer Likelihood: Incorporates machine learning to predict how much more or less likely the user is to develop skin cancer based off historical raw UV data
- Sun Intensity Alerts: Push notifications to warn users of high UV levels and advise on protective measures.
- User-friendly App Interface: Easy-to-navigate app providing a seamless user experience for monitoring and managing sun exposure data.
Relevant links: Documentation
Other details: My partner Niru Vijaya Krishnan, and I created this for HackPrinceton, a hackathon hosted by Princeton University in November 2023. This was my first experience at a hackathon, and I went into it with no expectations. I was astounded to see just how much my peers are capable of and how much output you can get when you dedicatedly focus on a single task for 36 hours. I was practically dead after, but it was absolutely worth it. I look forward to doing more hackathons in the future.
IRRIGO: IoT-based remote watering and monitoring system for houseplants
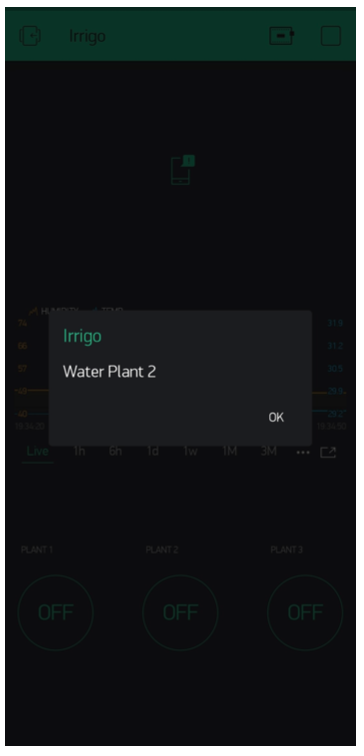
Improper watering is one of the main reasons why household plants die. Most people do not have any concrete methods of watering their plants when they are away. ‘Irrigo’, short for ‘Irrigation on the Go’, aims to resolve this problem.
Irrigo is an IOT based smart gardening system. It allows people to remotely water and monitor the environmental factors (moisture, humidity, temperature) of their plants. This leads to convenience and an increase in the plant’s lifespan.
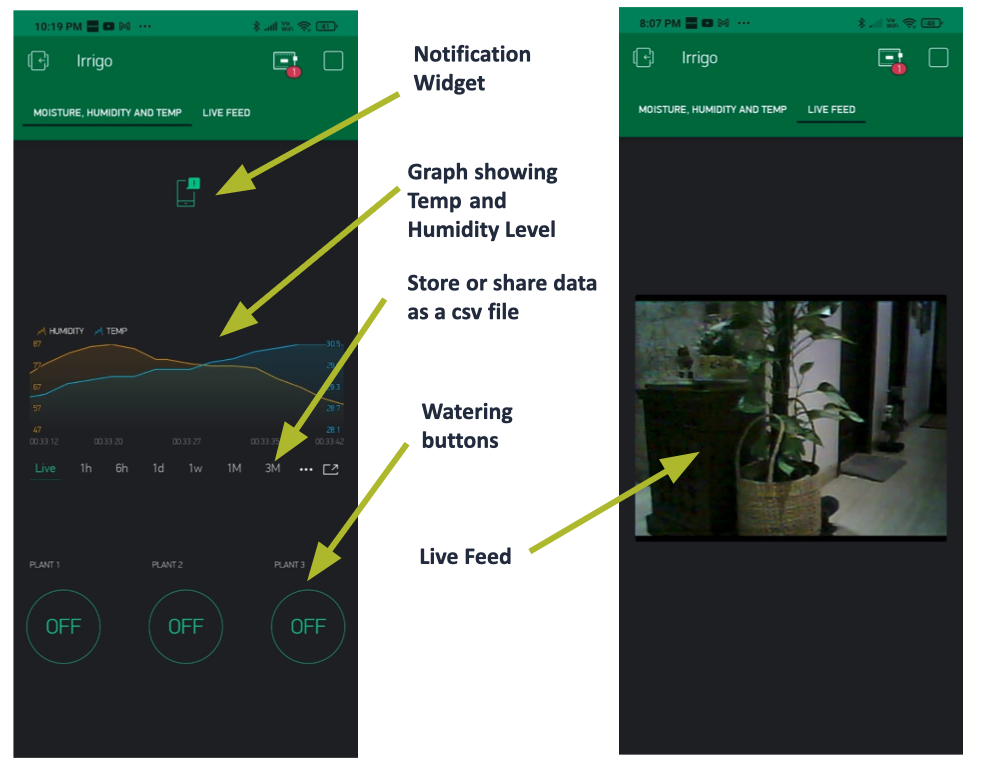
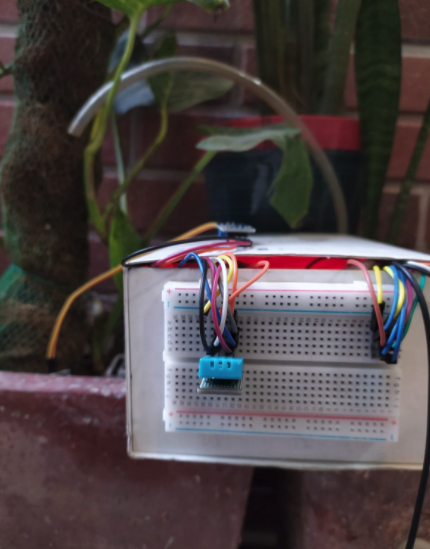
The project consists of 2 parts; the ‘on-site’ model and the app. The model was made using the ESP32 microcontroller which has been coded using the Arduino IDE. The app was made using the Blynk software.
The app graphically presents the humidity and temperature of the plants. It has watering buttons that allow a user to water their plants. The most recent prototype also offers a live feed.
The code has been written by referring to a large database of plant growth values. Using these, I defined upper and lower bounds for different plants. Hence, the model can water and monitor all kinds of plants according to their individual water needs which is preferable for house plants.
Relevant links: Documentation
Other details: This was created as part of my school project back in grade 10th. This was my first time venturing into the world of IoT, so it was a great starter project. Over two-ish years, I learnt a lot because of this project- how to set up camera feeds, the difference between various ESP chips and IoT basics. I was encouraged to enter it into a few competitions, and it placed as one of the finalists in India’s IRIS National Fair. I hadn’t expected it to fare that well, but I think specific features like the attention to individual water needs and the live feed probably kept it in the running.
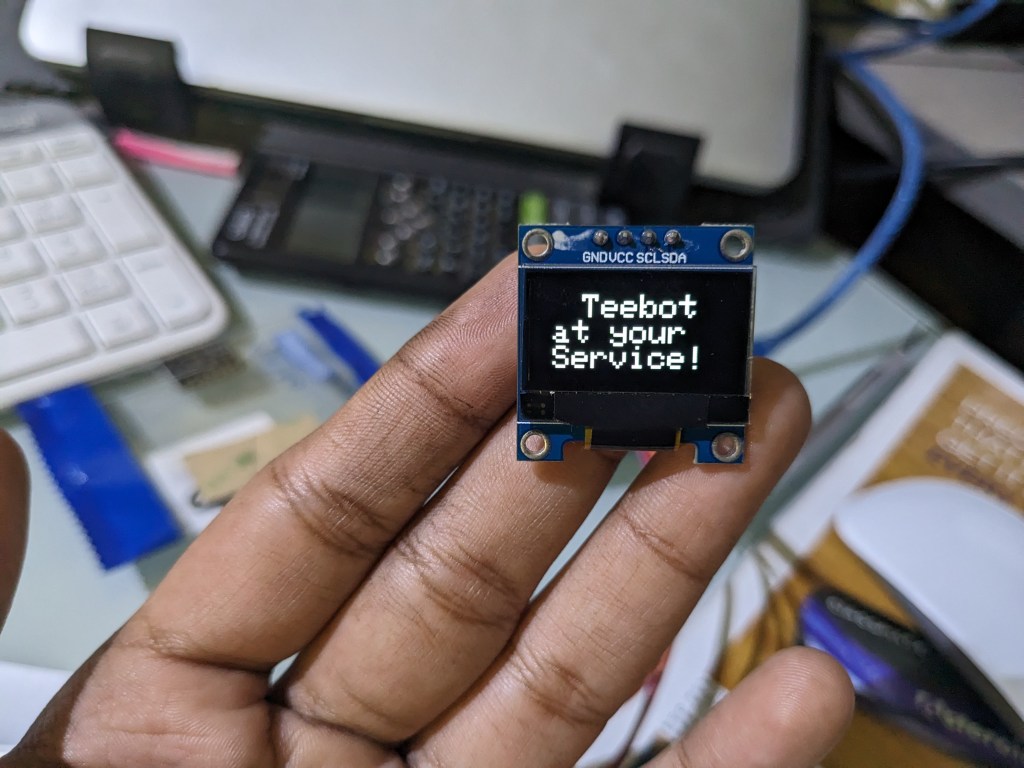
Teebot: The TShirt-folding Robot
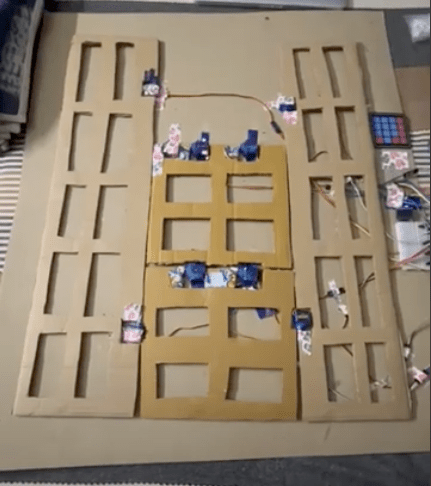
Teebot is a tshirt folding robot that uses servos and a 4-panel system to fold tshirts. This robot was inspired by Sheldon from TBBT who used a platic contraption to fold his TShirts. Teebot offers two modes; the first is the ‘single’ mode which can be used to fold tshirts out one-by-one. The ‘loop’ mode, on the other hand, asks the user for the number of tshirts the user would like to fold and runs the folding mechanism multiple times till all the tshirts are folded.
Relevant links:
Other details: This was just a fun project I made as a way to unwind after my college and JEE season was over. Plastic-based T-shirt folders have been around for a very long time. I thought of automating one. Realistically, I know that this project isn’t a game-changer. But my goal with this project was to learn more about Arduino. I used GitHub for the first time with this project and learned quite a bit about interfacing with Oleds, and Numpads, handling text inputs, and documenting issues. With my former project, IKSHANA, I had access to a 3D printer for creating the actuation mechanism, but with Teebot, I had to rig up the entire system’s old school- with cardboard and tape. I thoroughly enjoyed the process. My blog post details the entire process of creating Teebot.
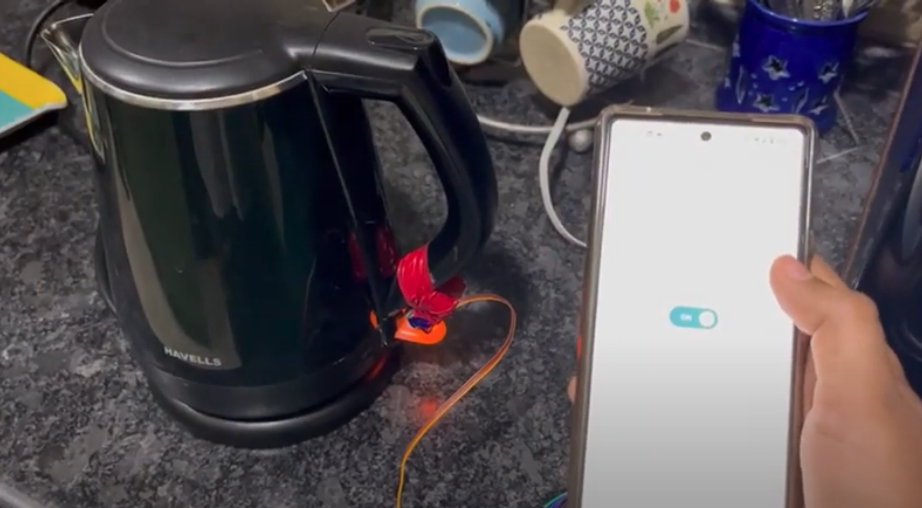
Teabot: The kettle-switching Robot
Teabot (a spoof of teebot) is an arduino-based kettle switcher. It was made for my father as a father’s day gift because he drinks a lot of tea and makes me switch on his kettle twenty times a day.
Relevant links:
Other details: This was a rather quick build because I already had Arduino IoT cloud setup for a previous build. I just edited the LED on/off logic to always reset to off because of the design of my kettle. Then just added a few lines of code to configure the servo in place of the LED.
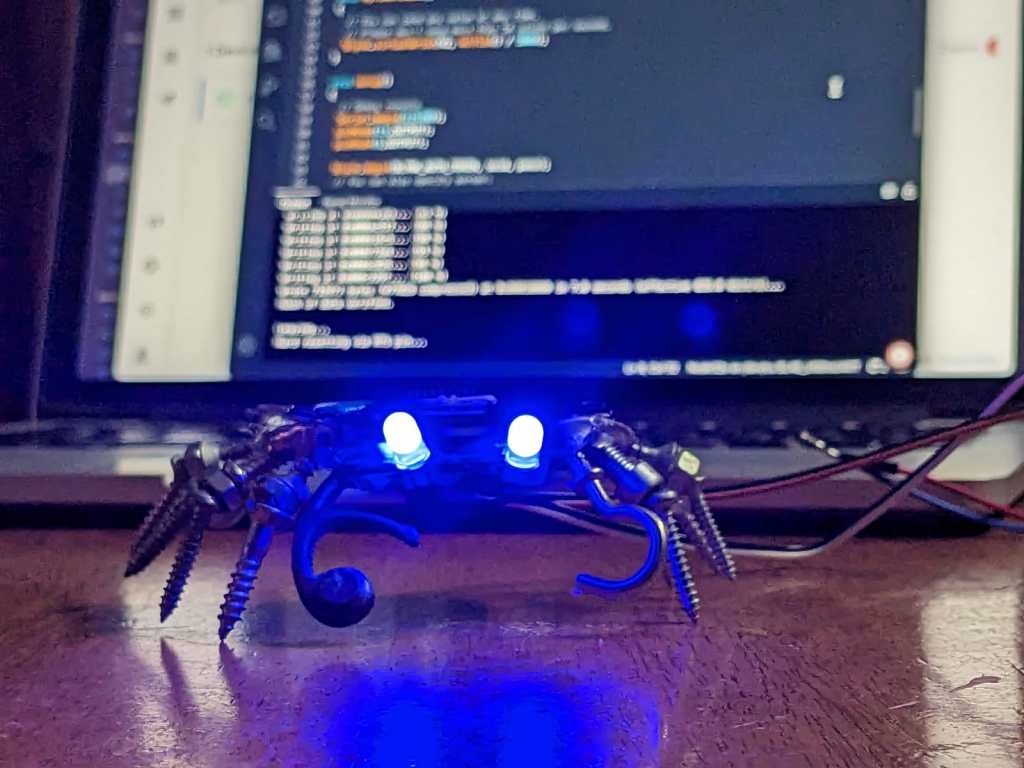
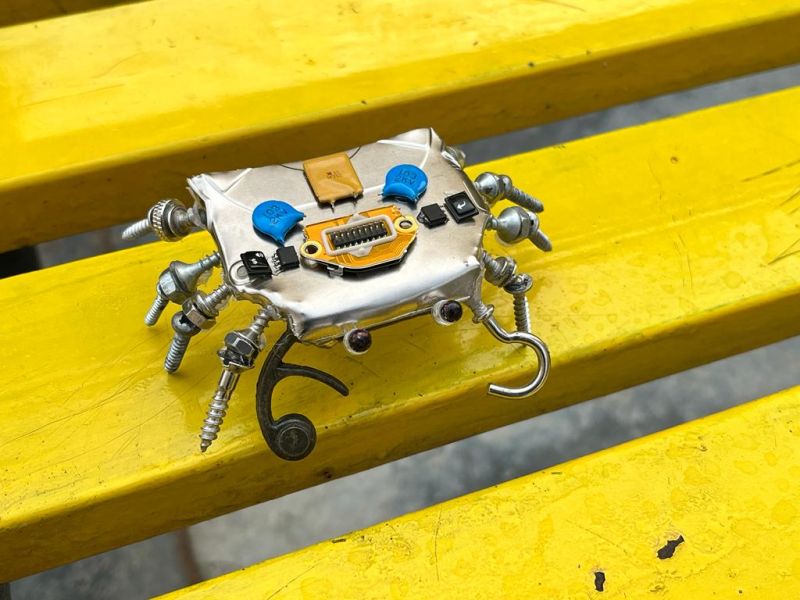
IoT-Enabled Crab Eyes
I made this crab from old electronic components as an art project. I wanted to test out Blynk 2.0 and Arduino Cloud with Alexa integration, so used the LEDs of the crab for fun. I can control the LEDs using the commands “Eye 1 on!” or “Eye 2 on!”.
I hooked up some DHT11 and moisture sensors too later to test other features out.
Relevant links: GitHub Repo
Other details: It was almost relearning everything. Blynk 2.0 is vastly different from 1.0. 1.0 involved more dragging and dropping rather than actual configuration, while 2.0, requiring more configuration, allowed greater personalization and included more features. Arduino IoT was super, especially since it works incredibly well with the web editor and offers stuff like Alexa integration. The boards I own are non-standardised knock-offs, so it was a pain trying to get them ready.
