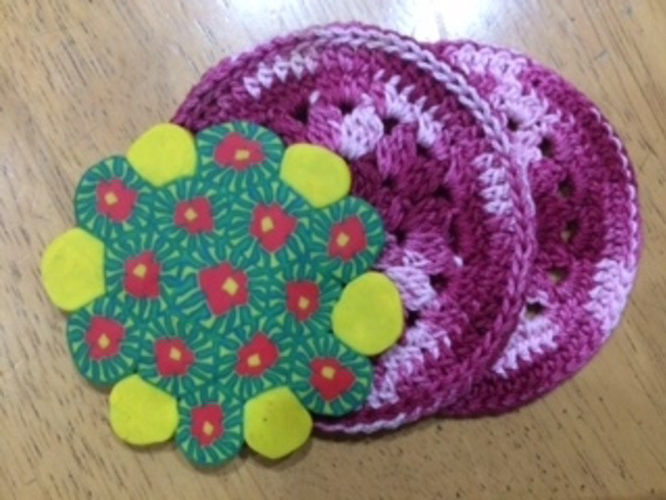
Recently I tried millefiori clay cane technique. Just to keep it simple, I made coasters. But using some of the techniques shared in earlier posts, you can make jewellery too.
Materials needed-
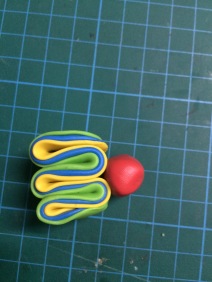
Step 1- Roll out a piece of blue, yellow and green clay.
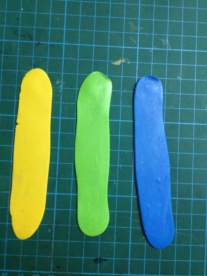
Here’s a trick: most people use pasta machines to get uniform thickness. So if like me, you don’t have one, you can use playing cards on either side of your roller to get uniform thickness.
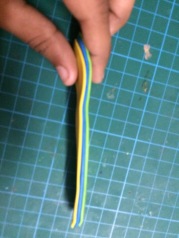
Step 2- Stack these on each other.
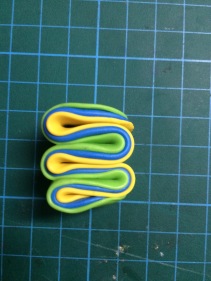
Step 3- Accordion fold this stack.
Step 4- Add a red log to one end.
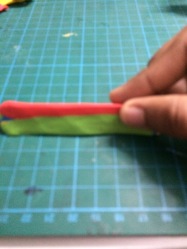
Step 5- Press this from all the sides to form a triangular prism.


Step 6- Reduce the canes. Apply more pressure from all sides to make the prism smaller.
Step 7- Cut the prism into 6 pieces. This is what I did wrong. I cut it into 5 pieces. This caused space issues later.


Step 8- Put all of these pieces together around a log of yellow.
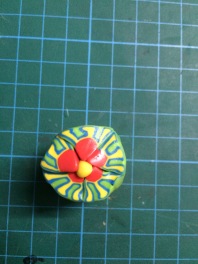
Step 9- Reduce this cane by rolling it against your work surface.
The cane is now ready.
The Coaster Part
Step 10- Cut out slices of the cane and arrange them in a circular pattern.To not squish the cane while cutting, place it in the fridge.
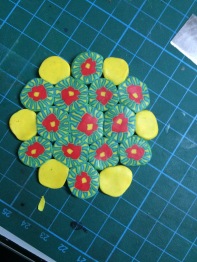
Step 11- Finally lightly flatten the coaster with your roller so that the pieces stick together. You might need to blend from the back.
The coaster is now complete!

Good job!
LikeLiked by 1 person
Thanks!
LikeLike
Your coaster is very beautiful. I also love kaleidoscopic canes. Great work! Have a beautiful week-end!
LikeLike
Thank you!
LikeLiked by 1 person
I have to thank you for the efforts you have put in writing this blog. I am hoping to see the same high-grade content by you later on as well. In fact, your creative writing abilities has encouraged me to get my very own website now 😉
LikeLike