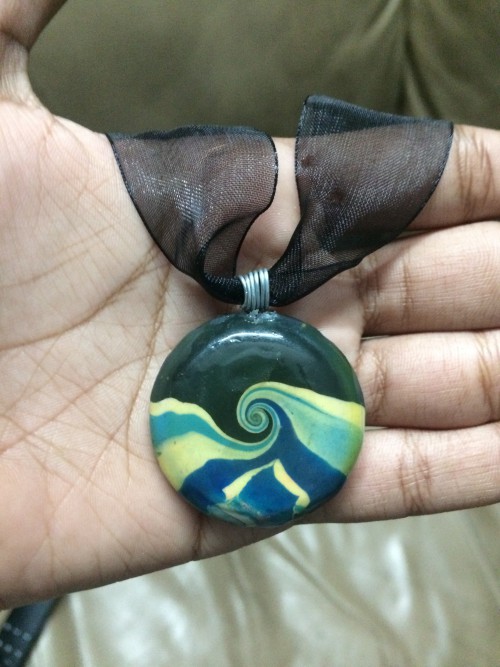
This week I made this polymer clay pendant.
I was inspired by Learn Polymer Clay’s scrap clay challenge to put my scrap clay to use too. The technique of this pendant was inspired by a youtube video by StudioSilverCreek. Check out her video here.
I’ll be honest, this technique works out for me only 70% of the time, so if it doesn’t work out for you too, don’t worry. So, let’s start!
Materials needed-
- Polymer clay in black, white, light blue, dark blue and other colours.
- Cutter
- Glaze (optional)
- Rolling pin
- wire (I bought mine from a local hardware store)
- Long nose Pliers
- Organza Ribbon or pre-made organza chords (I prefer the chords as they look better and save you the hassle of making them yourself.)
- Chord endings
- Bales
Step 1- Make a ball of scrap clay.

Now we need to cover this ball somewhat like this.

Step 2- Roll out a log of black and flatten it. Cover one half of the ball with it.


Step 3- Roll out logs of dark blue, light blue and white clay. Flatten them together like this.


step 4- Cover the other half with this arrangement.


note: the clay always scrunches up at the top. So, just roll the ball between your palms to make it very smooth.
Step 5- Take a hard and transparent surface like glass from a photo frame (which I would recommend) or a plastic lid of a container. Keep it at an angle and roll the ball with it.


You know you are doing this right when the shape of the ball becomes pointed at the two ends.
Step 5- Flatten the pointed ball.
Step 6- Make a bale. Wrap the wire 5 times around your pair of pliers and leave some at the end. Push the bale in the top part of the pendant. You can also use pre-made bales.


Step 7- Bake your piece.
Step 8- Glaze your piece. I usually don’t glaze my pieces. But this piece looks really good glazed. Unfortunately, my glaze never works. I use dimensional magic because it is shiny but it yellows very quickly. Triple thick isn’t shiny enough. And I can’t find any jewellery resin. Please share your suggestions.
Step 9- Measure the ribbon to the desired size. Cut it and thread it through the bale.
Step 10- Add chord endings to your ribbon. I did not have any of those so I wrapped wire around the ends and made a loop. It doesn’t look good, but is very durable.

Step 11- Add a clasp and jump ring to the ends.
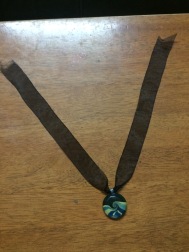
The pendant is now complete!

Thank you very much for joining the Use your Scrap Clay Challenge! Your polymer clay swirl pendant is very beautiful! Have a beautiful week-end!
LikeLike
Reblogged this on Learn Polymer Clay and commented:
Hello dear polymer clay enthusiasts!
I’m happy to see that the idea of using the scrap clay was a good idea and that other artists were inspired to use their scrap clay and make something beautiful.
So I was very happy to read this blog post from Divija and see how she turned scrap clay into a beautiful swirl pendant. Thank you, Divija , for joining the challenge!
Have a beautiful and inspired week-end!
Mihaela
LikeLike
Thanks Mihaela!
I loved the Scrap Clay Challenge! I am yet to try out your other clay techniques.
Have a good day!
LikeLiked by 1 person
Thank you for your appreciation! A good day to you too! And happy claying!
LikeLike
Very nice, indeed!
LikeLike
Thanks!
LikeLike
Wonderful idea! Keep going Divija!
LikeLike
Thank you!
LikeLike
Lovely! I love your improvisations regarding the wire loop endings to your ribbon. The whole effect, I’m sure, will look stunning.. 🙂
LikeLike
Thank you!
LikeLiked by 1 person
Love the pendant. I have been using my leftover clay to make the underside of my bracelets beautiful https://etsy.me/2EHqmkL
LikeLike